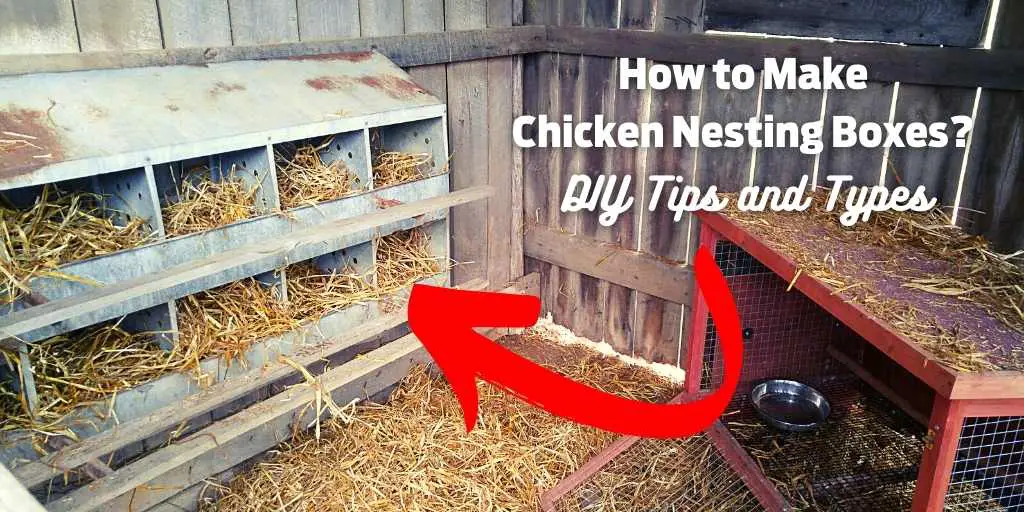
Do you want to make chicken nesting boxes at home? If yes, keep reading. Here, you will find DIY tips and ideas for making your own chicken nesting boxes.
These nesting boxes will make your hens happy, and they will lay their eggs comfortably.
Many owners don’t make chicken nesting boxes for their chickens inside their chicken coops. Chickens lay eggs in buckets, tubs, and bushes because there is no nesting space.
In this guide, you will learn how to make the best chicken nesting boxes at home using products from your backyard.
Let’s make a chicken nest box at home using metal and plastic.
What Are Chicken Nesting Boxes?
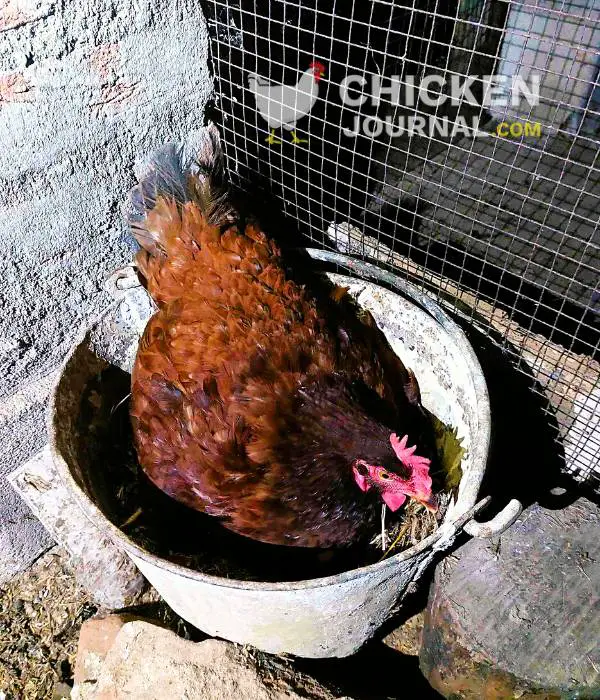
Chicken nesting boxes are essential to a chicken coop because they give hens a safe and cozy place to lay their eggs.
These nesting boxes are designed to look like the places inside a chicken house where chickens would typically lay their eggs.
Most chicken nesting boxes for chickens are made of sturdy materials like wood or plastic. But sometimes they are made of metal or galvanized steel, which keeps it rust-proof.
Because chicken egg-laying boxes are made to last through everyday use, most hen nesting boxes are small and closed off; some have curtains for privacy and safety.
The nesting boxes for the chickens are put in the chicken coop so that the hens can use them when they want to lay eggs. It gives hens a dark, comfortable place to lay their eggs.
Putting nesting boxes in your chicken coop is essential for the chickens and those caring for them. It makes it easy for the chicken nesting box to collect the eggs without irritating the hens or hurting the eggs in any way.
When buying or building chicken nesting boxes, consider how many hens you have and how large they are.
Each chicken should have sufficient space to lay their eggs without experiencing discomfort or feeling too crowded.
Last update on 2024-07-14 / Affiliate links / Images from Amazon Product Advertising API
Benefits of Making Homemade Chicken Nesting Boxes
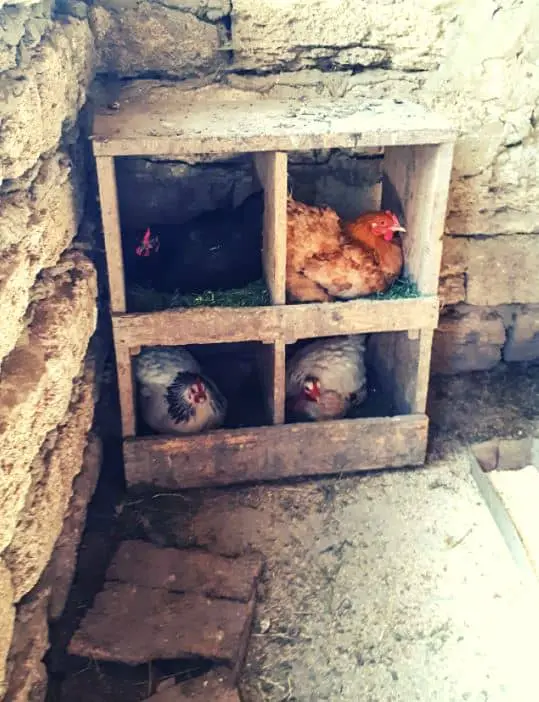
You can enjoy several benefits when you make chicken nesting boxes instead of buying them.
First, when you make your nesting boxes, you can customize them to fit precisely what you want and like. You can pick the size, shape, and materials that work best for your flock and space.
Secondly, you can save money by making your nesting boxes. If you want to buy nesting boxes that are already made, it can cost a lot of money, especially if you have many chickens.
If you make the hen houses yourself, you can save money and still give your hens a cozy and safe place to lay their eggs.
In addition, when you make your nesting boxes, you have the chance to use materials that have been recycled or repurposed. By reducing waste, you also make your chicken housing more environmentally friendly.
- 6 holes in 2 tiers; 30 hen capacity
- Nest bottoms removable for easy cleaning and litter...
- Easy to assemble with a screwdriver and wrench - no...
- High quality galvanized steel construction; All exposed...
- Ventilation holes in partitions for fresh air flow
Last update on 2024-07-14 / Affiliate links / Images from Amazon Product Advertising API
Furthermore, when you build your nesting boxes, you can showcase your creativity and do-it-yourself abilities. Doing this project can be enjoyable and make you feel good because you will feel proud and satisfied.
When you make chicken nesting boxes, you can make them easy to collect eggs and clean. You can add dividers that can be taken out or lids that can swing open to make it easier.
Moreover, when you make your nesting boxes, you can ensure that the materials used are of good quality and will last a long time. You can pick strong materials that will last a long time and make a safe and cozy place for your chickens.
Lastly, you can quickly repair or replace homemade nesting boxes if needed. You can take care of the boxes to ensure they stay in good shape for your chickens.
How to Make Chicken Nesting Boxes? Know the Calculation for 6, 8, 10, 20, and 30 Chickens)
- HAPPY CHICKENS- The curtain and raised floor placement...
Last update on 2024-07-14 / Affiliate links / Images from Amazon Product Advertising API
When making nesting boxes for your chickens, you should consider how many chickens you have.
Whether you have 6, 8, 10, 20, or 30 chickens, you need to give them nesting boxes that are comfy and work well.
You’ll need a wooden box about 12 inches wide, 12 inches deep, and 12 inches high to make a breeding box for six chickens. Using dividers, split the box into six sections.
Ensure each section is big enough for a chicken to lay eggs comfortably. Put soft nesting materials like straw or wood shavings in the sections to make a cozy place for your chickens.
If you want to keep 10 chickens, choose a box about 18 inches wide, 18 inches deep, and 18 inches high.
- [Give Your Hens Privacy to Lay]: The Rural365 Curtained...
- [Use Your Bedding]: We recommend filling the hen boxes...
- [Perfect Size]: 1 box per 5 hens (used one at a time)...
- [Built to Last]: High-quality impact-resistant &...
- [Easy Setup]: Instructions included, screws required...
Last update on 2024-07-14 / Affiliate links / Images from Amazon Product Advertising API
Make sure each space is big enough for a chicken when you divide the box into ten sections. Again, use the right items to ensure your feathered friends are comfortable.
When you have 20 chickens, you’ll need a giant nesting box about 24 inches wide, 24 inches deep, and 24 inches high.
Split the box into twenty sections, giving each chicken enough room to lay her eggs comfortably. Remember to give your chickens something to nest in if you want them to be happy.
Remember that the nesting box size is essential to ensure your chickens have enough room to lay their eggs without feeling crowded.
Giving your flock clean, cozy nesting boxes will make them more likely to lay eggs regularly. So, use your creativity to make chicken nesting boxes that fit the needs of your feathered friends.
How to Make Chicken Nesting Boxes Using Wood Blocks?
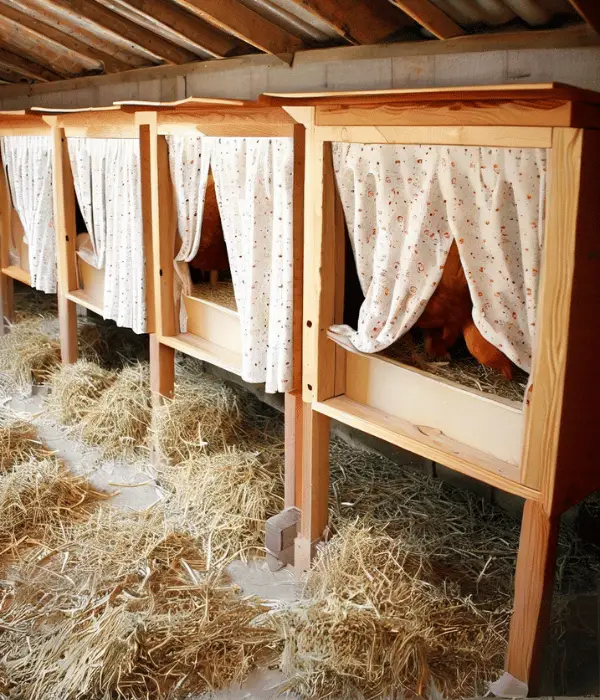
Building a comfy place for your feathered friends to nest and lay eggs is essential for their well-being.
This guide will walk you through creating cozy wooden nesting boxes, step by simple step.
To start, gather the necessary materials: wood blocks, screws, a saw, measuring tape, and a drill. These basic tools will make the project a breeze.
Next, measure and cut the wood to create boxes about 12 inches wide and deep. Each box needs a bottom, front, back, and sides. Assemble the pieces securely with screws and a drill for sturdy construction.
What makes a nesting box truly inviting? Line the bottom with a layer of soft straw or wood shavings.
This cozy bedding will keep the eggs warm and your hens snug as they settle in to lay.
Once assembled, personalize the boxes with paint or wood stain. Bright colors or fun designs will add cheer to the chicken coop. Curtains across the opening provide privacy for your modest feathered ladies.
With these simple steps, you’ll have built delightful wooden havens for your flock. Your chickens will appreciate the care you’ve taken to craft their new homes.
Enjoy watching them happily explore and nest in their custom-made boxes!
Also read: Top 15 Best Pre-made Chicken Coops
How to Make Chicken Nesting Boxes Using Plastic? – DIY Ideas
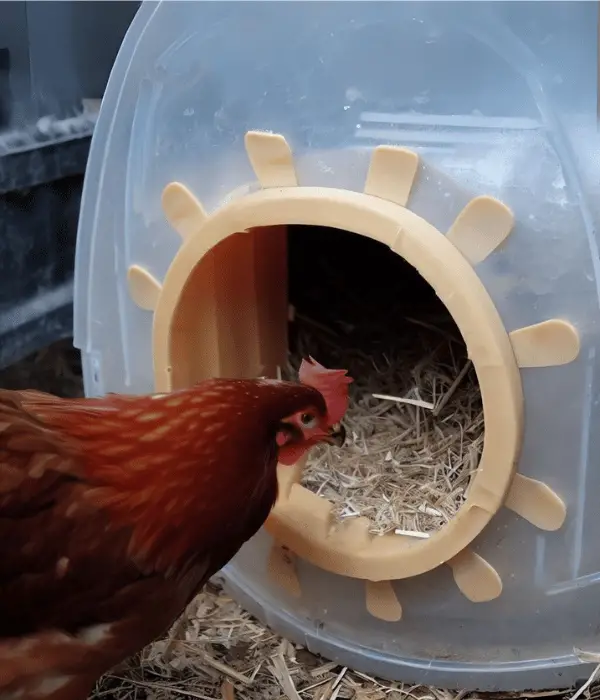
Keeping hens snug and content is easy with a DIY plastic nesting box. Plastic is a sturdy, cleanable, and affordable option that provides a safe haven for egg-laying.
This straightforward guide shows you how to craft cozy nesting quarters from plastic containers.
First, gather deep, wide containers with lids. Ensure they’re pristine and free of harmful edges.
Next, mark each lid’s top where it opens up. Use a marker or knife to carve a semicircular hole just big enough for your feathered friends to move through.
Cut out the holes carefully with sharp scissors or a knife, smoothing any rough edges. Jagged openings could injure your chickens.
Line each box’s base with a soft, warm layer of straw or wood shavings. This cozy bedding creates an inviting nesting spot for egg-laying.
Finally, affix the lids, using zip ties or clasps to secure them in place. Voilà! Your DIY plastic nesting boxes are complete.
Following these simple steps yields functional, hygienic nesting spaces your hens will adore. Plus, the plastic construction makes egg collection a breeze for you.
Your chickens will relish the snug sanctuary you’ve crafted, and you’ll delight in the effortless process of gathering their freshly laid treasures.
How to Make Chicken Nesting Boxes Using Metal or Galvanized Steel?
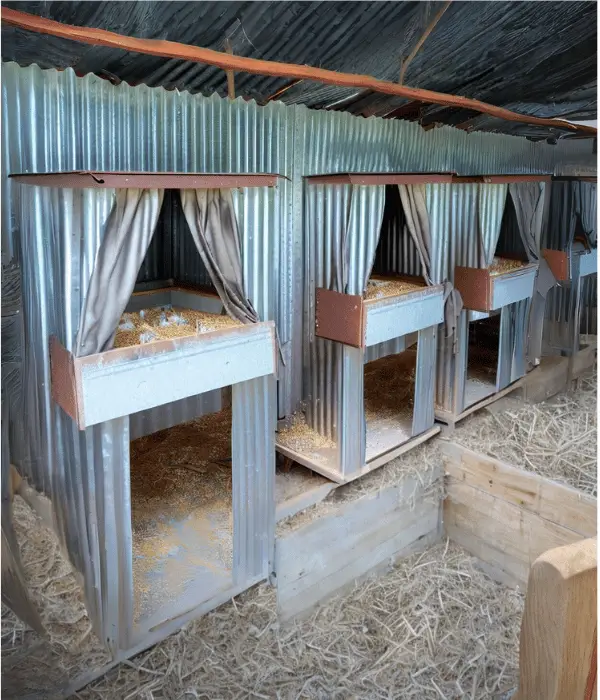
Metal nesting boxes for chickens are a wise option. They are strong and long-lasting. Here’s a guide to make them yourself.
First, gather the required materials – galvanized steel strips, tape measure, metal shears, screws, drill machine, and screwdriver. Having everything in place helps the process flow smoothly.
Next, measure the desired nesting box size. Use the shears to cut the steel strips accordingly. Ensure each box has a separate compartment for privacy.
Assemble the cut pieces into boxes. Screw the corners for a sturdy structure. Double-check the boxes’ positioning and sturdiness.
Now, construct a sloped roof for each box. Cut an additional steel piece and screw it atop the box to prevent water seepage.
Create a small entryway on the front panel to allow easy chicken access.
Find an ideal spot within the coop to install the nesting boxes. Drill and secure them firmly to the walls or frame.
Finally, line the boxes with straw or wood shavings for warmth and coziness, enticing the hens to lay their eggs comfortably.
Following these straightforward steps, you can construct durable metal nesting boxes that provide a safe haven for your backyard flock.
With these cozy abodes, your chickens will feel content and secure, ensuring a thriving egg-laying environment right in your backyard.
Best 5 Homemade Chicken Nesting Box DIY Ideas
- Poultry Box: Nesting box crafted from galvanized steel...
- Enhanced Security: Folded edges eliminate sharp edges,...
- Optimal Ventilation: Strategically placed ventilation...
- Convenient Design: Features a hinged perch design,...
- Easy Cleaning: Removable bottom metal inserts...
Last update on 2024-07-14 / Affiliate links / Images from Amazon Product Advertising API
Would you like to make nesting boxes for your chickens? We’ve got some easy and creative ideas for you.
Here are the 5 best and simplest DIY nesting box ideas.
Old Wooden Crates
Take old wooden crates. Add a hinged lid on top. You can now easily check inside. Paint the crates bright colors. They’ll look nice and work well in your chicken coop.
Five-gallon Buckets
Get a clean, empty five-gallon bucket. Cut a small hole on one side. Line the inside with straw or sawdust. This makes a cozy nesting spot for your chickens. It’s simple and cheap.
Milk Crates
Stack some milk crates securely. Make multiple levels of nesting boxes. Line each crate with soft bedding. Your hens will be comfortable. This DIY idea is practical and costs little.
Wooden Pallets
Use strong wooden pallets. Cut them to the size you want. Attach the pieces to your coop’s wall. Add a slanted roof on top. This protects the nests from rain and wind.
Plastic Storage Bins
Take plastic storage bins. Cut a small hole in one side for entry. Put straw or hay inside. Your chickens will have a cozy spot to nest. The bins are easy to keep clean.
Your chickens need a safe place to lay eggs. You can make cozy nesting boxes yourself. It is an easy project that won’t cost too much.
With simple steps, you can build nice boxes for your feathered pets. The chickens will be happy. You can make the boxes in more creative ways.
Other FAQs About Chicken Nesting Boxes
How Big Should Chicken Nesting Boxes Be?
It’s not always easy to say how big it is to build a chicken nesting box. It differs from breed to breed because of their size.
Make one chicken box for every 3–5 hens to avoid flock crowding. Chickens believe that something someone uses is inherently better and will try to lay in the same box as everyone else.
A standard nesting coop for conventional chickens such as Sussex, Leghorns, Plymouth Rocks, and hybrid layers like Amberlink must be in dimension 12×12 sq. inches. This will fit the average chicken very well.
Larger birds like Jersey Giants need 12 inches deep, 14 inches wide and 12 inches tall.
What Are the Chicken Nesting Box Dimensions and Sizes?
The right size for a chicken nesting box is about 12“x12” x14”. If you keep more giant chickens, like Jersey Giants, you could go up with that number, just as chicken boxes might be smaller. You want them to feel like it involves them in space without squeezing.
What Must Be the Height of Chicken Nesting Coops From the Floor?
The floor-mounted enclosures are clean. There is a suitable height from 4-6 inches off the ground. This facilitates egg collection.
How to Put Bedding for a Chicken Nesting Box?
Clean bedding is the key to cleaning the nesting boxes. The box should be deep enough to protect the eggs from being pushed around by other chickens and break if they do.
Bedding also helps to prevent egg breaking. If chickens accidentally break an egg, the instinct is to eat the egg to “hide the evidence” from potential predators.
The problem is that chickens intentionally drop and break eggs once they taste their eggs’ deliciousness.
How Many Nesting Boxes for 6, 10, 20, and 30 Chickens?
When raising a flock of chickens, having the right number of nesting boxes is essential.
For a small group of 6 hens, you’ll need at least 2 cozy boxes. This gives each hen their own private spot to lay eggs with ease.
If you have 10 hens, 3 to 4 nesting boxes are best. More boxes mean more room, so no one feels cramped while laying eggs.
With 20 hens, you need 6 to 8 boxes. A bigger flock needs more space. For a large group of 30 chickens, you’ll need 10 nesting boxes or more.
Plenty of options keep the ladies happy and egg-laying on track. Remember, crowding leads to stress and fewer eggs. So give your flock enough nesting spots.
From my personal experience, providing ample nesting spaces is essential for the health and productivity of the chickens.
My hens are happy when they are given own private zones, and as a result, I receive a large number of fresh eggs. It’s a win-win arrangement for both parties!
What Is the Importance of Curtains in Chicken Nesting Boxes?
Chickens like to have a quiet and cozy place to lay their eggs. Curtains inside their nesting boxes help make them feel safe and calm.
The curtains give the hens privacy, so they can lay eggs without feeling stressed.
Curtains also help keep the nesting boxes at a good temperature. In cold weather, the curtains keep the nesting boxes warm. In hot weather, they keep the nesting boxes cool. This makes the hens more comfortable.
Another important job of the curtains is to protect the eggs. The curtains act as a barrier between the nesting material and the eggs. This stops the eggs from getting dirty or broken.
As a chicken owner, I can tell you that my hens seem much happier since I added curtains to their nesting boxes. They lay more eggs, and the eggs stay cleaner.
Putting up curtains is an easy way to create a cozy home for your chickens. It helps them feel relaxed and safe when laying eggs.


Leave a Reply